Friday, November 10, 2017

Activated Charcoal Face Mask - Not for me


Activated Charcoal Peel Off Mask ; Activated Charcoal Mask - secret to perfect skin ; Activated Charcoal for hair or teeth ; It was very trending for the past few months, and it definitely caught my attention. However, I was little worried about my allergies, so I bought 15 capsules of activated charcoal for my first try.

Let me begin by explaining what is activated charcoal, and what it means by "activated".
"Activated charcoal” is similar to common charcoal, but is made especially for use as a medicine. To make activated charcoal, manufacturers heat common charcoal in the presence of a gas that causes the charcoal to develop lots of internal spaces or “pores.” These pores help activated charcoal “trap” chemicals.In other words, there are many "pores" ready to be filled in by absorbing any dirt present near it. And that's what makes this mask so famous - the ability to absorb dirt and oil on the surface of the skin.


But whether it really do the trick on acne prone skin is a different story. My skin is acne prone, and thus, I have large pores. This is because when excessive oil and dirt collect in your skin, your skin swells, which is very common among acne prone skin.

I have seen many review and did research on this activated charcoal mask. It claims that it removes dirt, excessive oil, and minimize pores. So, I gave it a try. Let me show you the result below. 


Before applying mask
(Many blackheads around my nose and pores are large and visible)
1. I personally use only 2 capsules.
2.Twist open the capsule and pour the
activated charcoal out in a container
(Note: do not do this near a fan)


3.Use drinking or filtered water to mix with
the powder. Do not use pipe water as it
contains Chlorine and will dry your skin.
4.use a mask brush to mix it. Mix till the
 powder blends with the water.


Apply mask over problematic area on the face
and leave it for about 15-20 minutes or till dry.
(I leave it until its partially dry)
(I did not leave the mask for too long as it will dry
out my skin, which is something that you will
want to avoid)
This is roughly what it looks like after the mask is dry.
Well, it doesn't change to a pale grey colour because it is not a
clay mask. The colour will remain the same. I use the sense
of touch to determine if the mask is dry.


Before applying the mask, I applied 10-15 minutes of hot towel around my entire face to open up my pores (LOL, I know I already have large pores, but I still do it anyway). After the mask is dried, I wash my face with warm water. It left black stain on my face after the first (only water) wash. I was terrified and quickly use facial wash to wash my face, and it was much better. 


Even after I washed my face using a facial wash, some stain still remained on my face.
This towel is the evidence to the stain that stayed on my skin. It also prove that I wiped off
any excess stain on my face on this point.


This is what it looks like immediately after removing the mask.
If compared, the blackheads are visibly gone. However my pores
did not shrink as the reviews promised.

Because the Activated Charcoal mask drains out all the oil on the surface of my skin and I used a facial wash to clean up my face after that, my face was terribly dry. It has that "kirk kirk" sound when I touch across my face. It feels clean of course, just like a dish washer cleans that oily plate. But deep down, I know my face shouldn't be this dry. So I quickly apply moisturizer to my skin.  

After a while, my face feels a bit tight and when I smile, my face forms tiny tiny wrinkles !! Because its too dry!! Oh no!!
I keep checking my face in the mirror every half an hour or everytime I walk past a mirror. And I was shocked by the result.


After 2 hours, my blackhead appeared again. Not because the blackhead has built up
in that short amount of time, but the blackhead wasn't removed by the mask at all, it was not
removed since the beginning of time.
Another thing i realized was, not only that the activated charcoal did not suck out the dirt from my pores, it however binds the dirt, and got trapped inside my pores. If you can zoom in and see (especially around the nose), there were certain pores which was originally clear and did not have black spot, and later got the black spot (appear like blackheads) after the mask. I was so disappointed ! And then I decided, Activated Charcoal is definitely not for me. It just worsen my condition because I have large pores.

At this point, one might think that Activated Charcoal and glue will yield a better result. Or mixing it with glue is the ultimate trick to make this mask work. Let me explain why I refused to use glue. 

Have you ever read the ingredients behind a school glue? The chemicals used in glue are not formulated for skin. You might say that those molecules are not small enough to penetrate the skin, but how sure are you? Personally, i'm not taking any risk as I already have problematic face. Besides, there are so many YouTube vidoes shows how much blood and tears it cost to remove the peel off mask. 

It is always feels satisfactory to see all those tiny tiny "dirt" being pulled out from the pores. Those are sebaceous filaments. Image below is the difference between a blackhead and a sebaceous filaments. 

Sebaceous filaments functions : A sebaceous filament is a tiny collection of sebum around a hair follicle, which usually takes the form of a small hair-like strand. They usually have white or yellow color, and can be expressed from the skin by pinching. These filaments are naturally occurring, and are not a sign of infection or any other ailment. They help to channel the flow of sebum within a given skin pore, allowing it to seep gradually to the surface. (source: wikipedia) 


In lay man terms, the function of the sebaceous filaments is to keep your skin moisturized. It is very easy to be confused between whitehead and sebaceous filaments. Whiteheads lie below the surface of your skin and blackheads are at the surface. The reason blackheads look black is because when that gunk clogging up your pore is exposed to air, it oxidizes due to the melanin in skin cells, turning black or dark brown.


What then causes whiteheads? Whiteheads are considered mild form of acne, which happens a lot to my skin. And clogged pores are the main cause of whiteheads. It is a type of acne that forms when dead skin cells, oil, and bacteria become trapped within one of your pores. One cause of blocked pores is hormonal changes, which are common triggers of acne. Certain life stages like puberty and menstruation can increase the amount of sebum, or oil, your pores produce. The increased oil production causes clogged pores and whiteheads. Can be controlled by changing lifestyle and medical treatment, but its not avoidable. 

Therefore, it is useless to use peel off mask (especially glue) to pull out all the sebaceous filaments as it will start refilling the pores once its removed. You might think that by removing the old sebaceous filaments and allow new one to produce, it will reduce the chance of getting whiteheads and blackheads. Actually, by removing the old sebaceous filaments, the pores are empty which allows bacteria to sit on easily. Bacteria acts faster than your toner shrinking your pores by the way. 

In the nut shells, activated charcoal is definitely good for skin. Try using commercial, non-peeling activated charcoal mask to remove dirt instead . I am not financially ready to buy commercial activated charcoal mask as it is quite expensive. That is the reason why I tried using the capsule one and end up disappointing myself because of my large pores. I wonder if the commercial one works on me. I should definitely try it one day. 

Note : Please correct me if i'm wrong, I will definitely want to know where I went wrong with the DIY activated charcoal mask or is it really not for me.  


Thursday, June 9, 2016

CHEMICAL FREE ACNE SCARS REMOVAL

Too scared to use any commercial products? Couldn't find a suitable commercial products for your face, but those acne scars are torturing you? Try this.

Yogurt Honey Oat Mask
Making reference to the title above, this mask only uses 3 natural ingredients, but the result? Beyond Incredible. It will never fail to impress you for how amazing your face will look in just one month time. 
  I've applied this mask everyday for one year. Yes, EVERYDAY. You may wonder if it is risky and harmful to apply it everyday into our skin. Well, research in Google suggest mask (of any type) is only recommended to apply twice a week. But on the other hand, the same resource suggest that it is absolutely fine to apply a natural based mask everyday.
  Personally, i chose to follow the second suggestion. The rationale is that although some of the natural ingredient may contain chemicals like preservatives or food conditioners, so long as its safe to consume, then its safer to apply directly to our skin everyday. Assimilate it to taking vitamins everyday.
  I've been applying this mask continuously for one month, and the result really gave me a gasp and i couldn't stop starring at my reflection behind the mirror. Could my face get any smoother? I ask. The acne scars are gone, the skin is smoother, and hydration restored. Of course, it took me one whole month to see a slight change. Why one whole month? Because it is natural. The change is not obvious for the first few weeks. (note: you will feel the difference by touching, but as for visual effect, it takes time).

Function of the ingredients.
 Oats : Main function is to absorb and remove excess oil and bacteria from your skin and exfoliate dead skin cells, thus helping to combat acne.

Honey : Main function is to moisturize the skin and treat inflammation.


Yogurt : It contains natural anti - bacterial and anti - fungal properties. Main function is to reduce irritating breakouts.


Steps to do mask.

This will be by-product.
Step 1 : Grind ground oats using a blender or food processors into powder form.
You can grind a large amount oats and keep it in a container so that you don't have to grind it every single time.


Step 2 : Prepare a small bowl, and fill in with a right amount of oat powder. You will know what is the right amount after some time.


 Step 3: Add a small amout of 
yogurt and mix until you get the consistency like on the right picture. Note that you should not add too much of yogurt because adding honey afterward will render the paste too watery and it will not sit on the skin.
 Step 4 : Add a small amount of honey and mix. The consistency should look like on the right.


Step 5 : Apply the paste on a clean dry face for 30 minutes and let it absorb onto your skin.
Mind that applying the paste might get a little messy, so it is preferable to do it near the sink. Caution with the hair also.


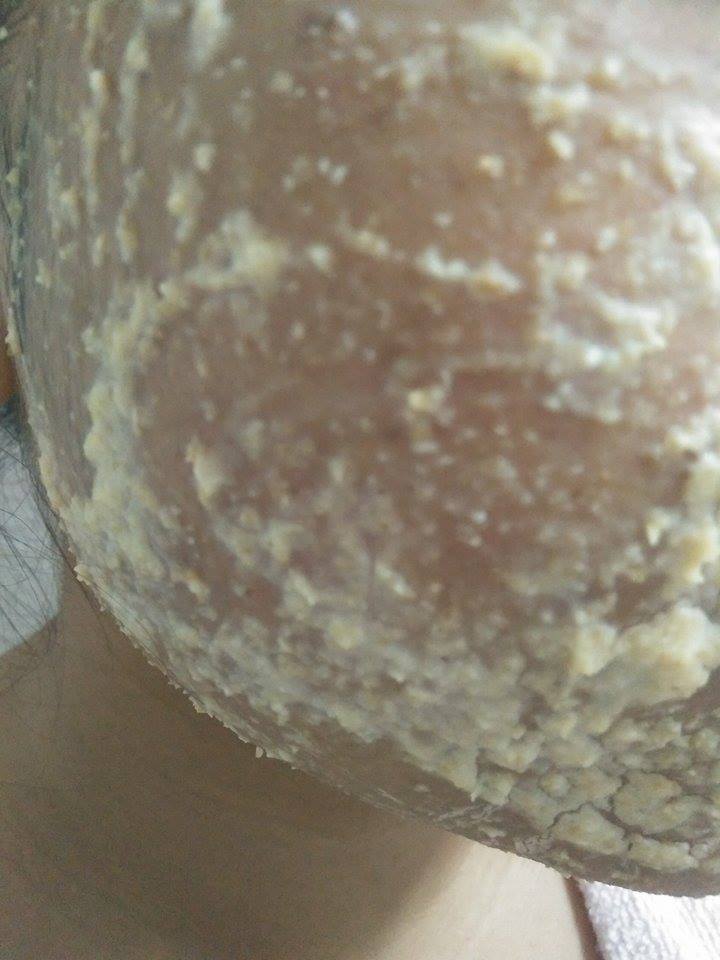
 Step 6 : after 30 minutes, the paste will be harden and dry, just like the picture on the right. Now you can wash your face. It is very difficult to wash it away with only hand and water. I suggest to wash it using a wet damp cloth. As you wipe it away using a wet cloth, the friction is also helping you to exfoliate your skin.


Tada! This is the end result. Feel the difference. At this point, use your favorite moisturizer to lock the moisture.


Side Note.
  1.  I understand that I've mentioned about the usage of Hiruscar to remove my acne scars, but i too found another cost saving and lower risk alternative to fade my acne scars. So i stopped using Hiruscar for a little while and start applying the mask for one whole year. It definitely did not disappoint me. 
  2.  I have a friend who is sensitive towards Honey. She tried applying honey onto one small part of her face and she got allergies. You can try different type of honey to see if you are allergy towards it. Sometimes it is just about the type of honey you are allergy to. I hereby disclaim any responsibilities towards any sort of negative result.
  3. I will try my best to upload and submit my progress on my blog but it will take some time because it takes up to few weeks to track the progress.
  4. I'm extremely sorry if you did not get any reply from me in this blog. I am not so sure what is wrong in the system, but my replies to your comments and questions are not appearing even after a few try. I will sort this out. 
Happy Trying Everyone! Drop your comments and questions below and share your successful stories to inspire others. 


Saturday, September 12, 2015

Hada Labo skin care routine...(based on personal experience)

Acne prone skin? I've been in a situation where every direct salesman or woman will make me their target for their beauty products, it doesn't matter if its a set of face wash with moisturizer or if its a consumption product, I'll always be their first target. I can't even walk freely in supermarkets, because they will be chasing behind me with their brochure and products even-though I said No. And because my acne breakouts left me with a face of terrible scaring ( view my previous post for more details *with pictures*). I was really upset until one point where I wish i could just peel of my skin and replace with a new one.
  *at this point, I would like to advise those who are desperately wanted to have a better skin to not to try any random products, and even if you tried, if you feel uncomfortable like itchiness or redness or more breakouts, please stop using it and consult a doctor immediately. Because a product which suits you will not cause you any harm but improve your skin.
I went for a professional face spa (purely herbal) and wasted approx 1000 MYR in a year and yield no result.And the worst part is, my parents struggled to pay that fees just to make me feel better. Sigh.  I guess the owner of the spa is having a big meal somewhere right now. 
In the very beginning. my face was like this.


To begin with, most people are having this misconception about acne prone skin. Drying up your skin or using any product which will wash off your sebum oil on the surface will not help you in reducing your acne in any way. Believe me when I say drying up your skin will cause your face to be more oily than before. Reason?


Sebum is a naturally occurring substance that is produced by the sebaceous glands, which are found in the skin and mucus membranes. The primary function of sebum is to moisturize, lubricate and protect skin and hair. And when you dry up your skin by washing your face too often, or use any products which dries up your skin, your body system will send a signal to the Sebum and trigger it to produce more Sebum to protect your skin.
One of the way to keep your Sebum production under control, is to moisture your skin. Hyaluronic Acid is a well known moisturizing agent which effectively lock down your skin moisture subject to the humidity - relative to the seasons and the climate. It has a unique ability to hold in moisture (1000 ml of water per gram of Hyaluronic Acid ) . Incredible? Indeed.

Personally, I use a product from Japan (Hada Labo) which contains a dense amount of Hyaluronic acid. 
It has few types. What I used in the beginning is the white series. As you can see in my previous post, I had a serious acne breakout with a very terrible scaring. After I found out how actually a sebum works and the way to control it, I gave it a try. I dare not to use the blue series as the blue ones has whitening effects. I did a small survey and found out that people with acne prone skin are not recommended to use any thing which has whitening effects (Although I was dying to become fairer from the result of sunburn), but since i was mainly on reducing my acne breakouts, I did not dare to take the risk of using the blue series and proceed to take the white series.


I used this cleanser in the beginning
It has the self-foaming pump bottle and the normal package, if you are a busy woman or a lazy woman (like me), I will recommend the self-foaming pump because it takes less effort to make the cleanser into foam form, and you can always buy the right one and squeeze it inside the self-foaming bottle and recycle it. But if you prefer the right one, then please do take the effort of making the cleanser into a foam before applying.


lather it till it becomes like this
Direction : wet your face, squeeze approx 2cm (or a 10 cent amount because its very concentrated) onto your palm, lather with warm water and massage gently onto face. After rinsing thoroughly, dab your face with a clean towel.

After some time, I realize there are some other similar cleanser from Hada Labo which is much more affordable for me. Basically, they have 3 types.


1. Deep clean & Blemish control
2. Deep clean & Pore refining
3. Hydra & whitening
I'm not so sure about the difference, but I realize that this is not as concentrated as the previous one, and its more watery. But by lathering the same amount of cleanser, gives the same result. I used the Deep clean & Blemish control, and it did dry out my skin, but i guess its because it cleanses your skin thoroughly including your apparent sebum. And I keep using it until now. Please make sure you do the necessary and sufficient moisturizing procedure after washing your face, it is very very important.

Just apply the toner first, following by a moisturizing lotion. (* all in small amount, do not be greedy by applying your moisturizer in a large amount, you are just wasting your product. Because our skin is only able to absorb a certain amount of lotion. ). In the beginning, after applying the lotion, I realize my face is so oily, literally oily. If this happens to you, please do not be terrified, this is just a stage where your face is trying to adopt with the new situation that's happening on your skin. Your skin needs time to get used to the current product. Do not lose faith as you can see a tremendous difference in just one month time.

I apply it twice a day, morning and night, especially at night. It's like a MUST for me. My apologies for not providing any personal "before after" photos, this is because I've been using this product for almost a year, and I did not capture the "before" photos, so there is no point showing the "after" photos. Note that I did not use the mask showed above, I did my own mask (I will do a preview on that soon) and somehow, both the mask and this product helped me a lot in reducing my breakouts.
If you apply make up very often, and if you really are a makeup person, you definitely will know that its hazardous for you to bring those makeups to bed. If you watch actress interview on how they keep their face in good condition, you will realize the first thing they mention will be about removing makeups thoroughly before going to bed. I use this product, also from Hada Labo which is olive oil based makeup remover and this is for heavy makeup. Although I don't apply heavy makeups, but my concept was, if it can remove heavy makeups thoroughly, then it definitely can remove light makeups even thoroughly, I don't know if this concept is true, but I believe it.

Directions : DO NOT WET YOUR FACE before applying this, both your face and your hand should be dry, squeeze a reasonable amount, and start massaging around your face. Rinse your face with water, the water will emulsify the oil and it will start to become milky. Then, wash with cleanser. 

Monday, July 21, 2014

Hiruscar after few months....pics

Hello bello everyone!! Uploading my new pics after few months upon request...hope Hiruscar will impress everyone of u!! currently only four photos available...
Only the reddish parts are my scars...the few black dots are my moles..lol...
this are my left right face.....you can see my face are quite clear now although its not as smooth as baby's skin...or normal healthy skin....but it does look so much better than last acne dark marks face.....agree??
Now let me show you the whole face look of me...before using Hiruscar and after using Hiruscar....


after Hiruscar
before Hiruscar

Friday, February 7, 2014

Hiruscar Post Acne Gel Review (continue~)


Hey hey hey..happy CNY everyone out there!! sorry for the late update..its been half a year since the last post...niway..cut long story short, allow me to proceed with my review....

I bet you have seen my previous acne scars which was very very terrible in my previous post....and now i am going to show you how much my acne scars has faded in just four months of usage....


this is my scars in November (after 3 months of usage)

this is my scars in December (after 4 months of usage)

Tuesday, October 15, 2013

Hiruscar post acne gel REVIEW~~~

OMG~! i'm so damn excited...~!!! updating my blog once again after like N years...hahhaha...okay..back to the story...i was having a very severe and bad acne scars all over my face that you can hardly find a clear skin space in my face...and i am SERIOUS...and i was so desperately wanted a clear skin like many other pretty girls out there...so i went through net and found this (below..) so i went to nearest pharmacy, bought it and decided to give it a try...
now..be ready..let me show you my face before i start to apply this gel....and ps: i seriously dunno what happened to the picture..it looks more like a sketched picture..but i must admit..my scars was very very bad...btw..although its the picture problem..but i will still show u guys..you know the picture is spoiled when you see my hair is like sketched...check this out..
Before applying HIRUSCAR
Before : it was so reddish..and those scars are so damn deep and the pigmentation is damn high...overall..sucks..

first week after applying Hiruscar
1st week : you can hardly see the improvement here...but those scars did fade slightly...and my skins started to get smoother...
2nd week
2nd week : errm...you can start to see those scars fading off...and its kinda obvious in the 2nd week...that two big pimples near my eyes and my chin is because of *spicy food* and *stay up late at night*..i know what actly caused my pimples...so i changed my lifestyle and my diet..like following it strictly...
3rd week
3rd week : as you can see ..those two big pimples i mentioned earlier is gone...so it shows that the strict rule of my lifestyle and diet was right...hehe..
4th week...
4th week : tada.~~~ as promised..my face look so much different after one month..seriously...IT WORKS...didn't regret of buying this...*wink

you will be able to purchase this product at the nearest pharmacy like Watson or Guardian. You can also purchase in any other private pharmacy...the price for this product will be around RM 20-RM 30...but its a small tube..but if this small tube with this price can make my face look so much better in just a month...its totally worth it...and i am going to keep using it..and even after one month...i still have like a quarter of gel left in the tube...hehe...
this gel is fast absorbing...non sticky and smells good as well...i like the smell..it depends..apply it twice a day..morning and before bed..you can use it 3 times a day too.. but for me, i just use twice a day..more than enough..after cleaning ur face with ur cleanser, pat dry ur skin with towel and apply hiruscar..after applying, you may proceed with ur skincare routine as usual...so that all from me...

I AM SO SORRY FOR THE BAD PICTURES....I BET YOU WILL BE ABLE TO SEE THE DIFFERENCE MORE CLEARLY IF THOSE PICTURES ARE NOT SPOILED...WELL..I'VE TRIED VARIOUS WAY...BUT THE PICTURES ARE STILL LIKE THAT...SO..ERM..SORRY...HEHE...

any questions or enquiries...you may just leave ur comments below..and i will reply ASAP...good luck!!